Main Supply Caps
The main supply caps were of unknown origin. They could
have been from the factory (look like the right vintage),
but I have never seen such tall caps like this in a 2230
before.
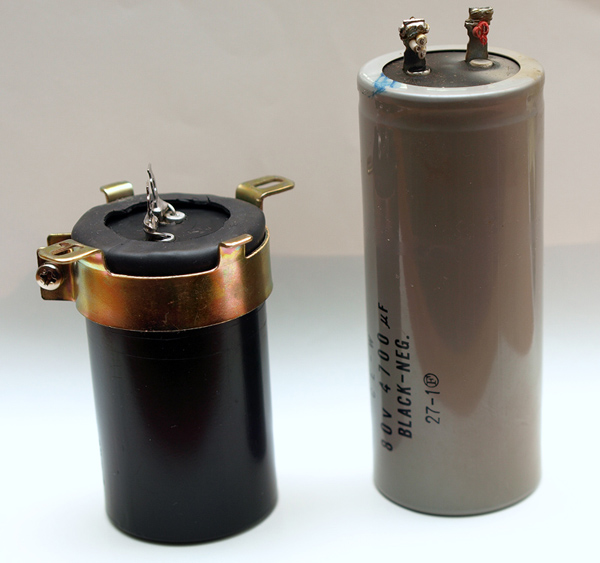
The tall gray one in this photo is the one I pulled from this
unit (large 4700uf cap at the back of the unit). The black
one is from the another 2230 (the same unit I pulled the
output board from). I have two other 2230s currently
sitting in the shop with the same short black caps.
The smaller 2200uf caps that sit forward in the unit were
also tall devices. Well... Needless to say... these got
replaced!!!
Rebuilt caps:
The black cap in the picture is a rebuilt cap. This section
describes how to use an old style can as a "holder" for a
new capacitor.
I rebuild cans when I can not find the correct sized cap to
"drop-in". I like to preserve the original look whenever
possible. All of the 4700uf and 2200uf capacitors
avalilable today are much smaller then the ones needed
here. Modification would have been required to hold the
smaller sized caps and clamps (the small 2200uf would
need to be mounted to a PCB, and the PCB mounted to
the chassis... a major mods I did not care to get into
here). By rebuilding the cans I can preserve the orginal
look of the unit and use the original mounting hardware
as well.
have been from the factory (look like the right vintage),
but I have never seen such tall caps like this in a 2230
before.
The tall gray one in this photo is the one I pulled from this
unit (large 4700uf cap at the back of the unit). The black
one is from the another 2230 (the same unit I pulled the
output board from). I have two other 2230s currently
sitting in the shop with the same short black caps.
The smaller 2200uf caps that sit forward in the unit were
also tall devices. Well... Needless to say... these got
replaced!!!
Rebuilt caps:
The black cap in the picture is a rebuilt cap. This section
describes how to use an old style can as a "holder" for a
new capacitor.
I rebuild cans when I can not find the correct sized cap to
"drop-in". I like to preserve the original look whenever
possible. All of the 4700uf and 2200uf capacitors
avalilable today are much smaller then the ones needed
here. Modification would have been required to hold the
smaller sized caps and clamps (the small 2200uf would
need to be mounted to a PCB, and the PCB mounted to
the chassis... a major mods I did not care to get into
here). By rebuilding the cans I can preserve the orginal
look of the unit and use the original mounting hardware
as well.
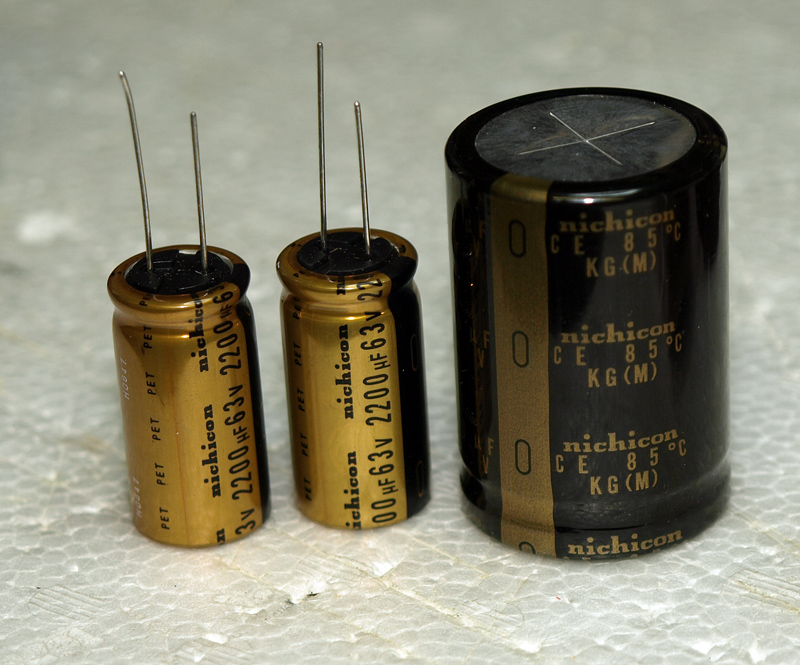
The replacement caps are
high quality audio caps from
Nichicon.
KG and FW (Find Gold) are
specifically designed for
audio applications. .
high quality audio caps from
Nichicon.
KG and FW (Find Gold) are
specifically designed for
audio applications. .
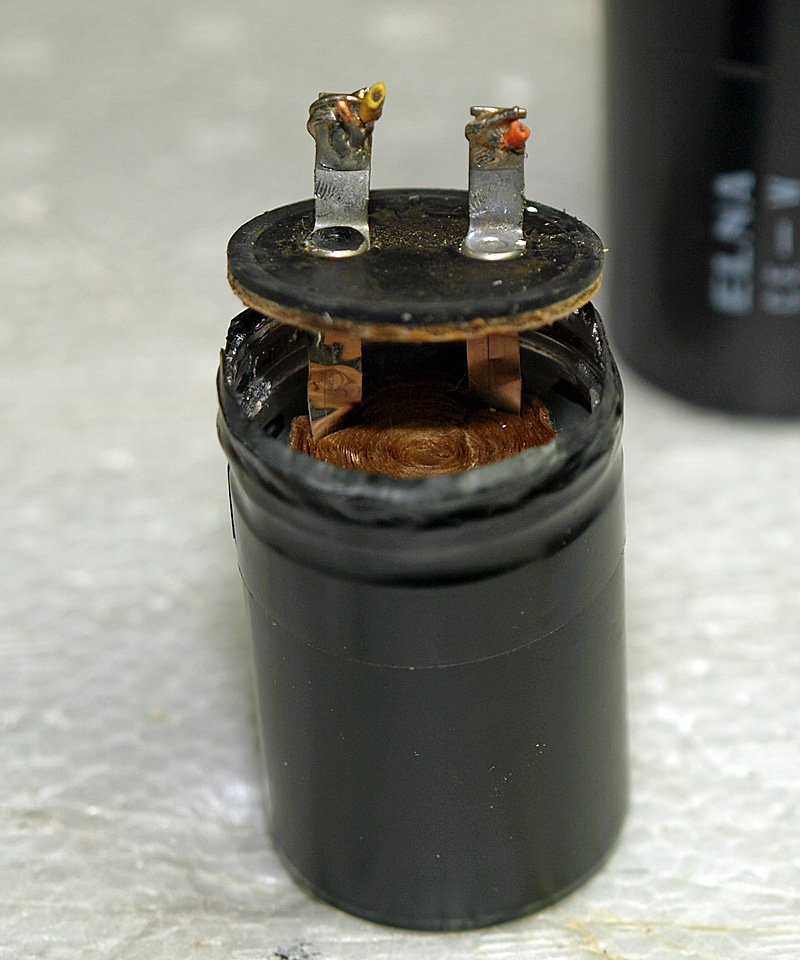
First we have to unroll the
crimp that holds the bottom
onto the can. I start this
process with a small fine
blade flat screwdriver. Once a
short section is turned up, a
set of needle nose pliers will
finish the job. I use a small
deep socket to smooth and
flare the lip out until it is
straight and will clear the
bottom cap.
Then pull up the bottom cap
and snip the leads to free the
bottom.
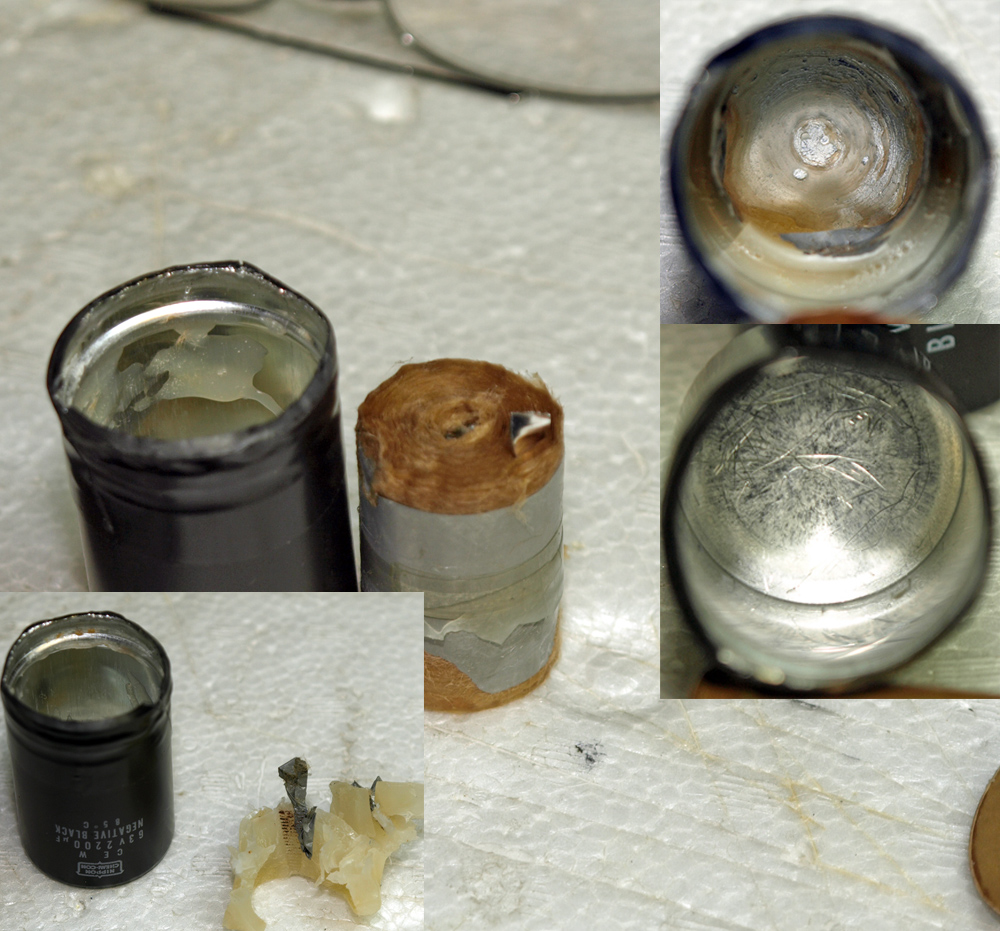
Below:
You can see the "working" part of the capacitor. It looks like a roll of paper. It is really a layer of aluminum and treated paper. When new, there
will be substantial oil in the can... enough to keep the paper saturated. However, this one is substantially dry and is a perfect example of why
these need to be replaced after 30 years of service. This core can be pulled out with a pair of needle nosed pliers. The core is anchored in a
wax like filler. This dampens vibration and keep the core form banging around in the can. Most of the wax can be worked up with a flat blade
screwdriver and pulled out in a big hunk. Residue of the glue can be cleaned up with a bit of scrubbing and strong solvent such a lacquer
thinner. Once you have a clean can you are ready to rebuild it.